I just love this shoot from the Modern Wedding DIY magazine and wanted to share how to create this amazing romantic dessert buffet with you.
Dessert buffets not only provide delicious tasting sweet treats for your guests to enjoy, they are also a wonderful visual feast. Style your dessert table around the same colour palette and theme as the rest of your wedding.
Treats in shades of pink, yellow and white have been selected for this table, to complement the floral arrangements. By combining dessert foods such as mini cakes, cake pops and cookies with a yummy mix of colour-coordinated candy, allows your guests to choose just how much sweetness they want to indulge in. Guests can simply pick up prettily wrapped jars of candy or fill their goody bag with their own selection.
Treats in shades of pink, yellow and white have been selected for this table, to complement the floral arrangements. By combining dessert foods such as mini cakes, cake pops and cookies with a yummy mix of colour-coordinated candy, allows your guests to choose just how much sweetness they want to indulge in. Guests can simply pick up prettily wrapped jars of candy or fill their goody bag with their own selection.
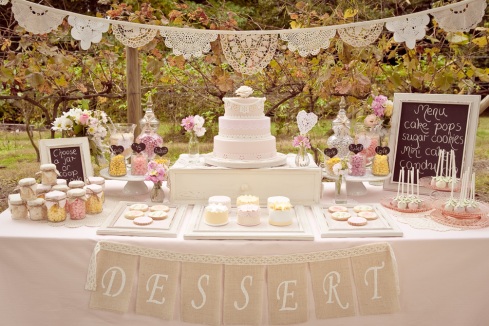
The stunning focal point of a dessert table is the wedding cake. The cake featured here is gorgeously decorated with a cute bunting pattern to complement the vintage doily bunting strung across the top of the table.
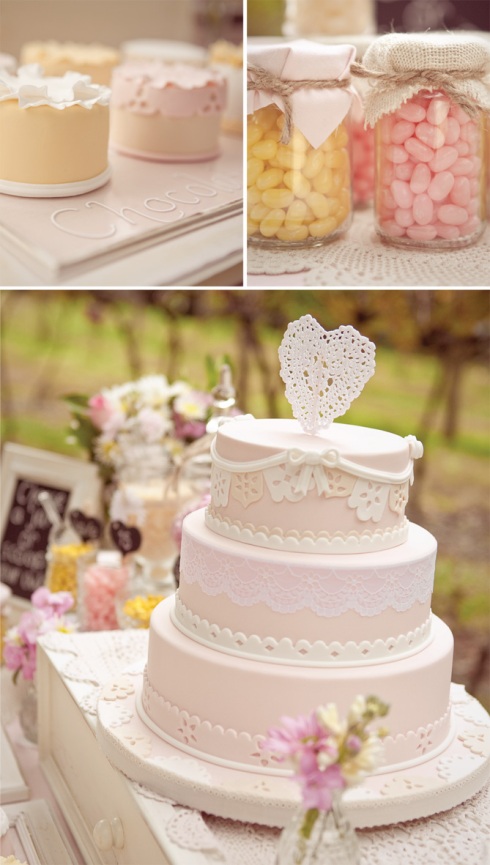
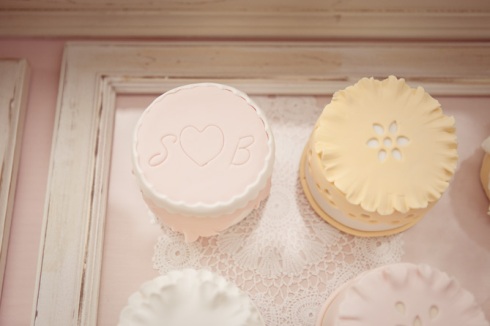
To create cute and unique serving platters use some distressed wooden frames. Desserts are simply placed directly on top of the glass. Coordinating coloured fabric and doilies can be used under the glass and the name of the dessert can be written directly onto the glass with a liquid chalk pen.
Add interest to vases of flowers by nestling a heart doily in amongst the blooms. To create this cute feature, stiffen a doily using fabric stiffener and glue it to a small skewer. These heart embellishments also look lovely as a cake topper.
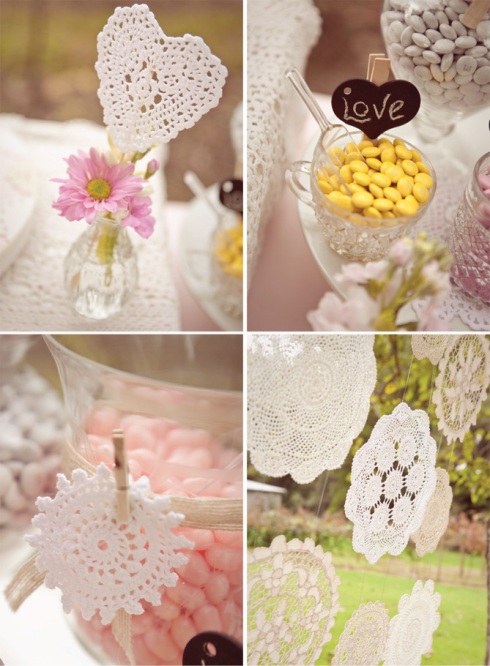
Chalkboards on the dessert table and throughout the wedding help inform guests of the day’s proceedings or little fun sayings can be written on them. To make the small heart chalkboards above we simply painted a wooden heart cut out and glued to a wooden peg.
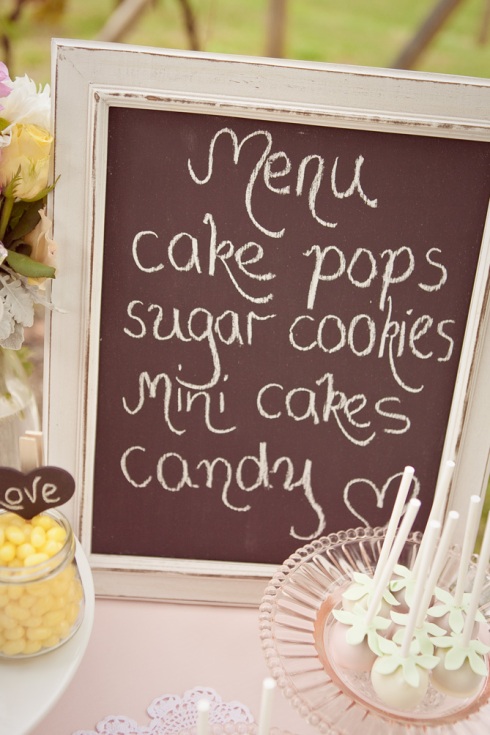
FRAMED CHALKBOARD
You will need:
Photo frame; white primer paint; foam paint brush; chalkboard paint
How to create:
You will need:
Photo frame; white primer paint; foam paint brush; chalkboard paint
How to create:
- Remove glass from the photo frame.
- Paint one coat of primer onto the backing board of the frame. Once dry, apply a coat of chalkboard paint following the directions on the can. Allow curing for at least 48 hours before writing on the board.
- Place board back into the frame.
*HINT- Use a damp cloth when removing the chalk from the board. A standard chalkboard duster will not completely remove all the chalk.
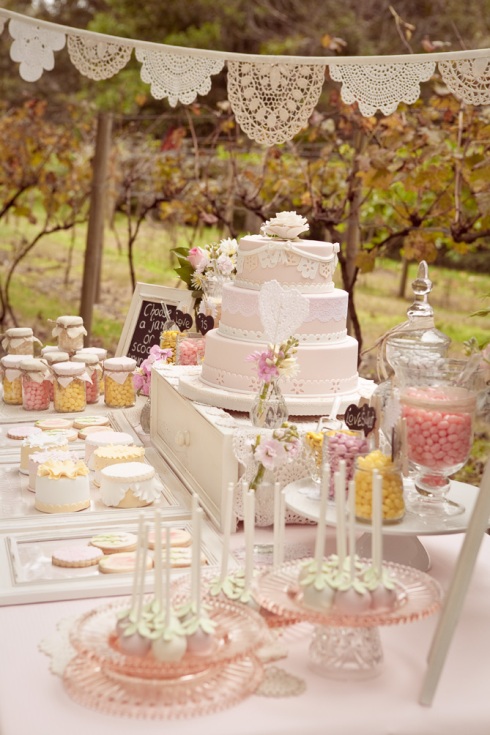
A clever visual trick when setting up a dessert buffet is to create different heights for the food. We have used a mix of cake platters, upside down drawers and glasses to add height. Also, think three-dimensionally and place foods behind one another and at differing angles.
Shoot destails:
CONCEPT & STYLING – Princess Allure Boutique Events
PHOTOGRAPHY – Sandra Henri Photography
VENUE LOCATION – Firescreek Fruit Wines
CAKES, COOKIES & CAKEPOPS - Frosted Fantasies
FLORAL DESIGNER – Buttercups Florist
DOILY CURTAIN & BUNTING – Princess Allure Boutique Events
ASSORTED CANDIES & JARS – An Affair to Remember
PHOTOGRAPHY – Sandra Henri Photography
VENUE LOCATION – Firescreek Fruit Wines
CAKES, COOKIES & CAKEPOPS - Frosted Fantasies
FLORAL DESIGNER – Buttercups Florist
DOILY CURTAIN & BUNTING – Princess Allure Boutique Events
ASSORTED CANDIES & JARS – An Affair to Remember


No comments:
Post a Comment